Introduction
Dense star fields, as beautiful as they are, can also be very annoying. Whether you’re processing an image of a faint galaxy or of a diffuse nebula, overpowering stars will often make it hard for the target to stand out. One way to address this issue is to completely remove the stars using StarNet++, which of course is at the cost of losing the natural beauty of the stars. A great compromise is to reduce the size of the stars, which is what we’ll cover in this tutorial. Side note : if you have a nVidia graphics card, I highly recommend enabling GPU acceleration for StarNet++, as it will make it run much faster.
The mask
Making a good star mask is by far the most important step in star reduction. A bad mask will cause webbing artifacts and will completely destroy the stars.
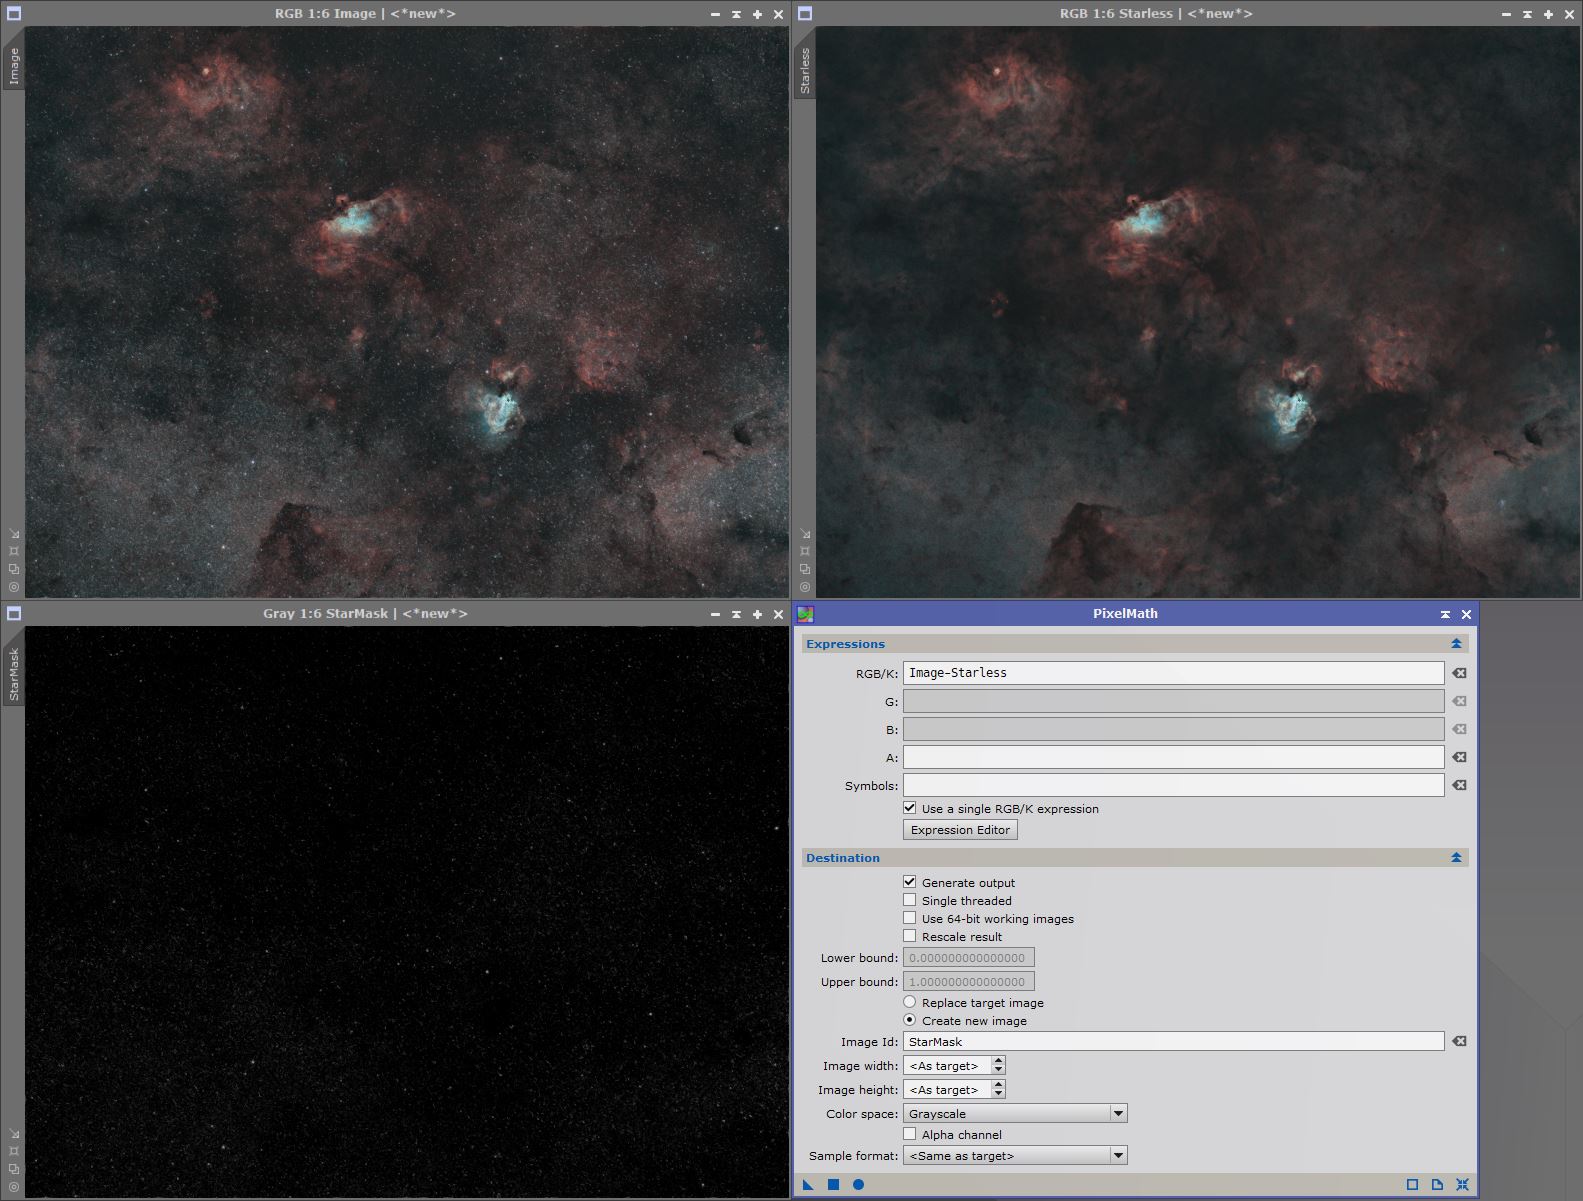
Step 1 : The first step is to run StarNet++ on a copy of your image (called “Starless”).
Step 2 : Create the actual star mask by subtracting this “Starless” image from the original image with PixelMath. Make sure to check Create new image and set Color space to grayscale (I’ll call this image “StarMask”).
(2021 Update : You can now directly create the StarMask image by checking the box in the StarNet++ window. This wasn’t the case before)
You might notice that the stars that are in front (or behind) bright objects aren’t properly represented in the mask. This is due to the nature of Starnet : it doesn’t simply remove the stars, it also replaces them in a content-aware way. Since we want the stars in the mask to be independent from what’s around them, we need to “equalize” the brightness values of the mask across the image. You could achieve this with a luminance mask and some curves, but in this tutorial I’ll use PixelMath.
Step 3 : Apply the PixelMath expression “mean(Starless*$T,$T)” to the star mask. Check Rescale result and Replace target image.
Notice how muted the stars in the center are on the image on the left.
In order to avoid destroying the stars completely, you will need to protect the star cores. Here’s a way to do it :
Step 4 : Make a copy of your star mask and invert it (Ctrl + I). I’ll call this image “StarCores”.
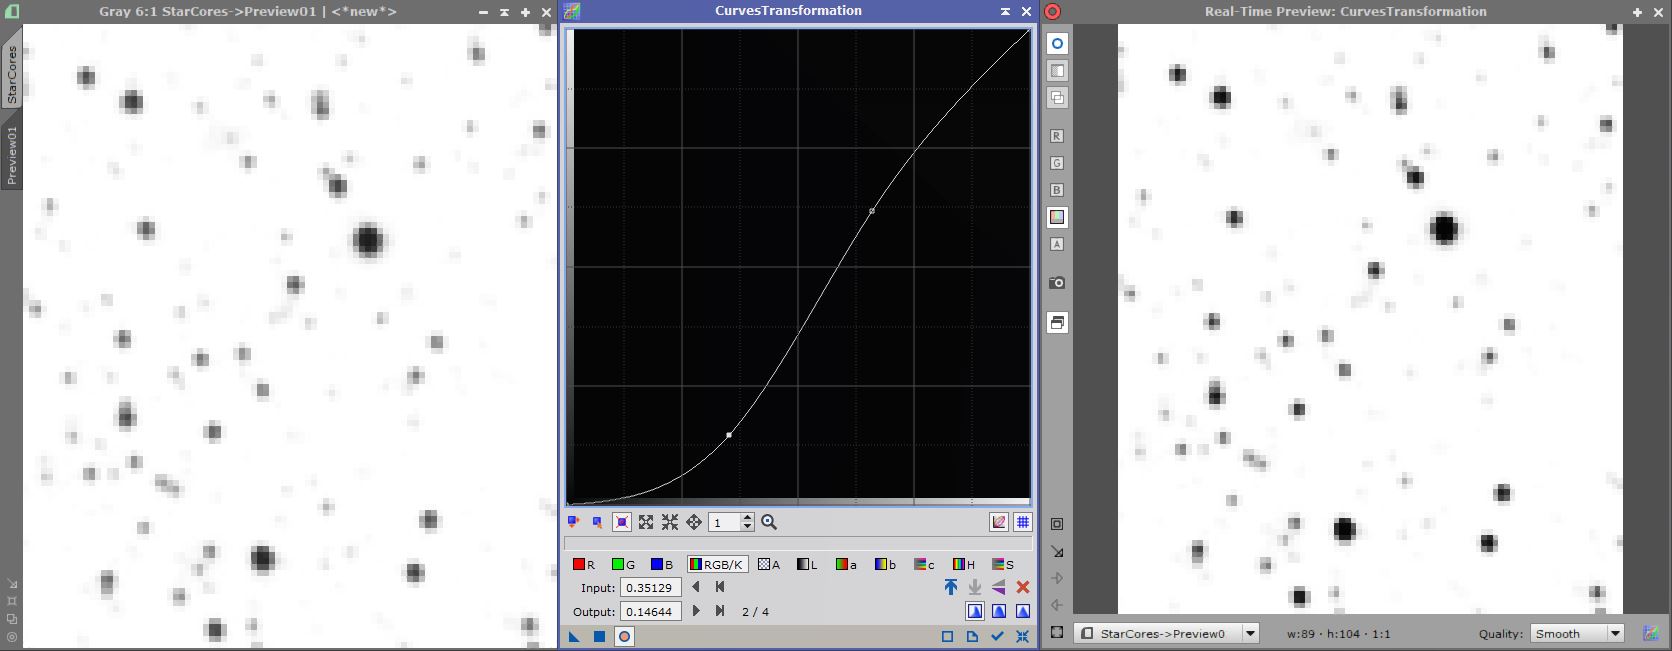
Step 5 : The black pixels in this image will be protected in the final mask. You may leave this image as is but you can also crush the shadows for better core protection or lift the highlights if you want to target the edges more aggressively. An easy way to achieve this is to use CurvesTransformation.
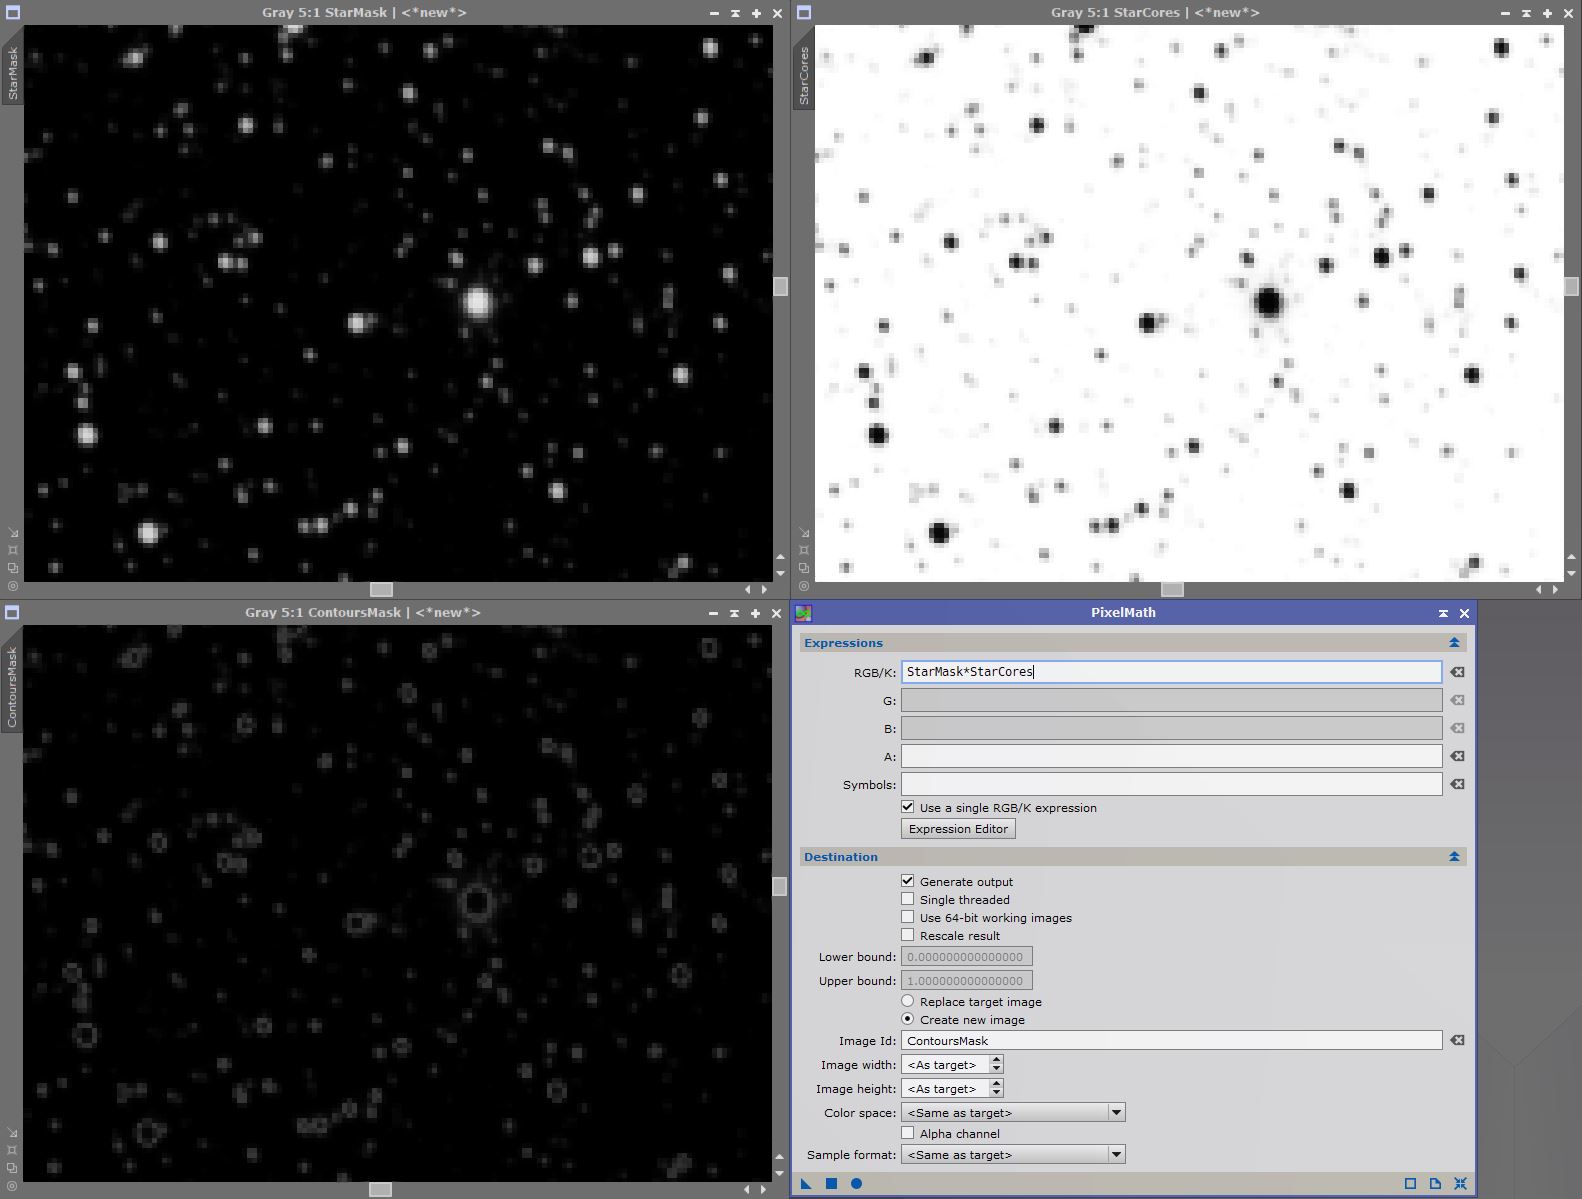
Step 6 : Create a new mask by using the PixelMath expression “StarMask*StarCores”. This will produce a contours based mask (I’ll call it “ContoursMask”).
A multiscale approach
We’ll get back to the mask but first let me introduce what I mean by “multiscale star reduction”. Often you’ll find yourself with large stars you may not want to reduce – or with small stars you may want to reduce less. In both cases, a multiscale approach is needed to differentiate the stars by their size.
In this tutorial I’ll show you how to protect the big stars but you can then of course adapt this method to protect the small stars instead (more on that later). The idea is to create a second mask that will map where the big stars are, and combine it with the first mask so that the resulting mask doesn’t contain the big stars.
There are several tools in PixInsight that allow you to create such a mask (MultiscaleMedianTransform is one of them), but I found that an approach based on MorphologicalTransformation was the most easy-to-use solution.
Step 1 : Make a copy of the “StarMask” image (not the contours mask !). I’ll call this image “BigStars”. Apply MorphologicalTransformation in Closing mode to it. The key is to change the Structuring Element size to your liking : a small structuring element won’t do much, while a large structuring element will erase the small stars.
This will require some trial and error to get it where you want it, but note that it doesn’t need to perfect (see below)
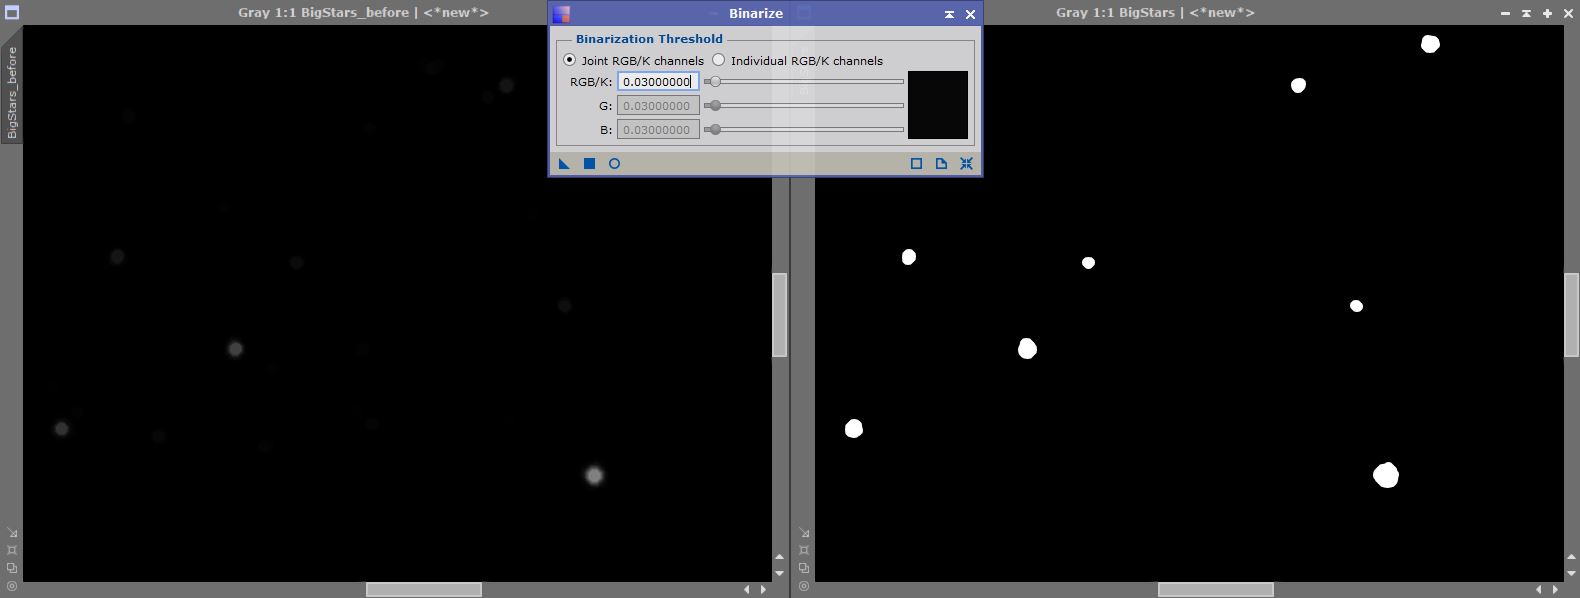
Step 2 : You now need to binarize this image, since the goal is to completely remove those stars from the final mask. This will also allow you to have greater control over which stars you want to protect. Apply Binarize to “BigStars” with whatever settings you want.
Step 3 : Apply the PixelMath expression “$T*~BigStars” to the “ContoursMask” image. $T is short for [target image], and ~ is the invert operand : you’re multiplying the contours mask with the inverted big stars map, which effectively erases the big stars from the mask.
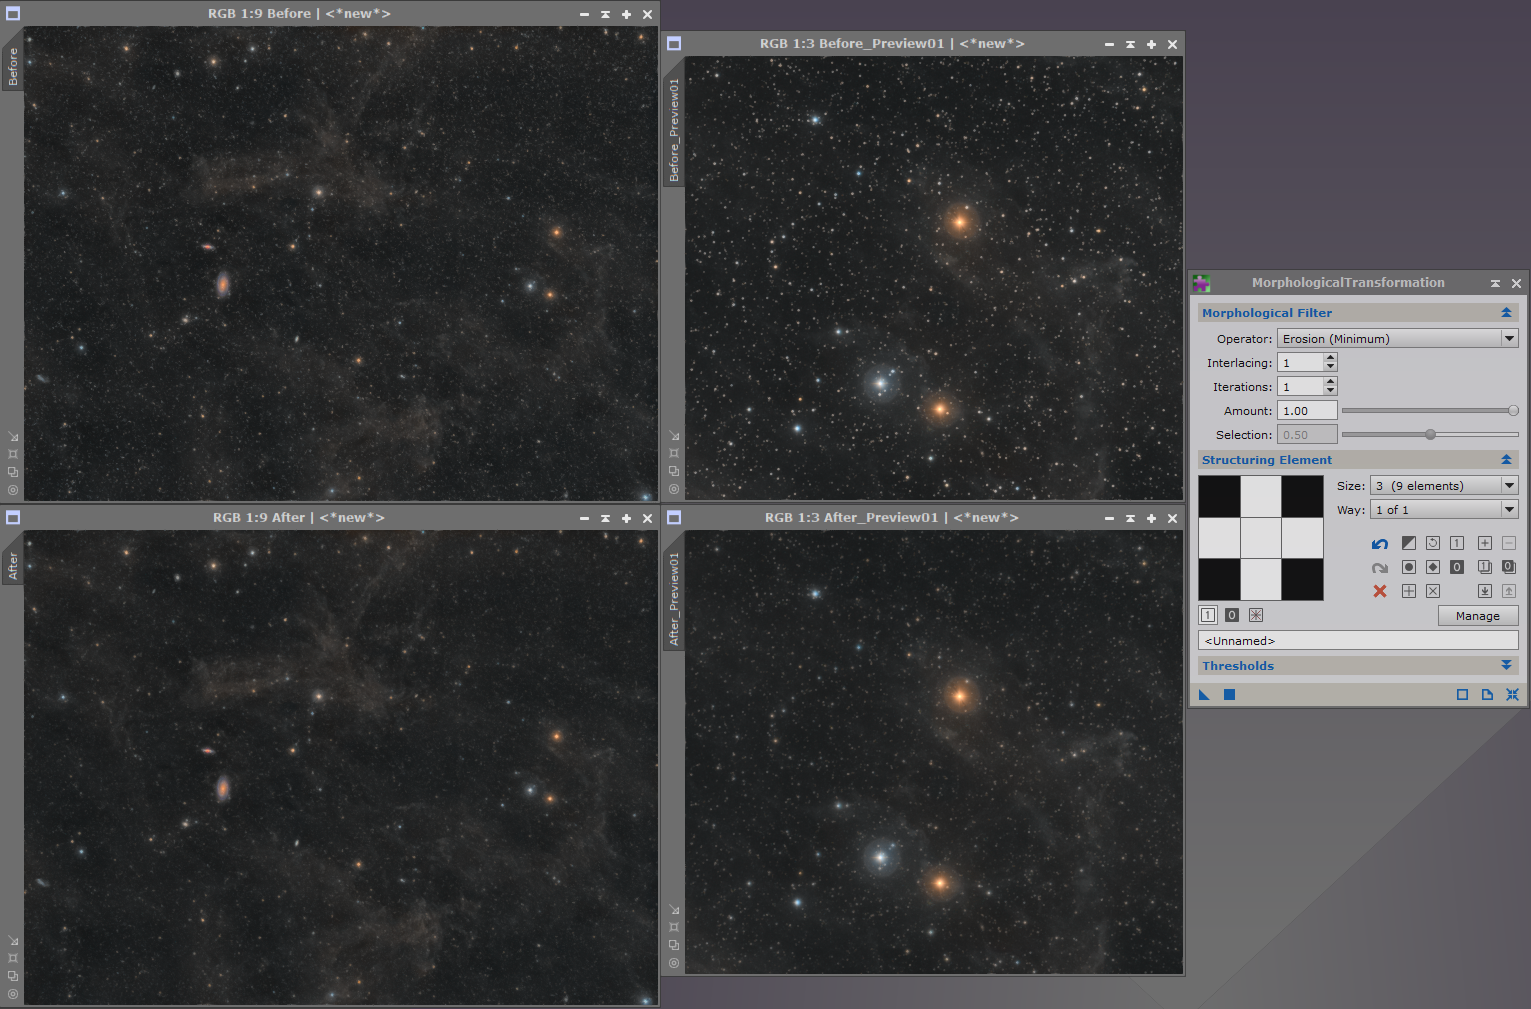
Now that we have a mask, we can finally reduce the stars. To do so, we are again going to use MorphologicalTransform. Set the operator mode to Erosion and the structuring element to a 3×3 diamond and apply the process to the image through the mask. Feel free to experiment with larger structuring elements – this heavily depends on the shape of your stars. Tip : if the effect is too strong, reduce the Amount setting. If it is too weak, increase the Iterations setting.
This is after running the process multiple times with various settings
Extra : protecting the small stars
The small stars often start to look weird (in a muted way) after multiple iterations, which is why you may want to differentiate them from the other stars in order to reduce them less. The same technique that was used to remove the big stars from the mask can be applied.
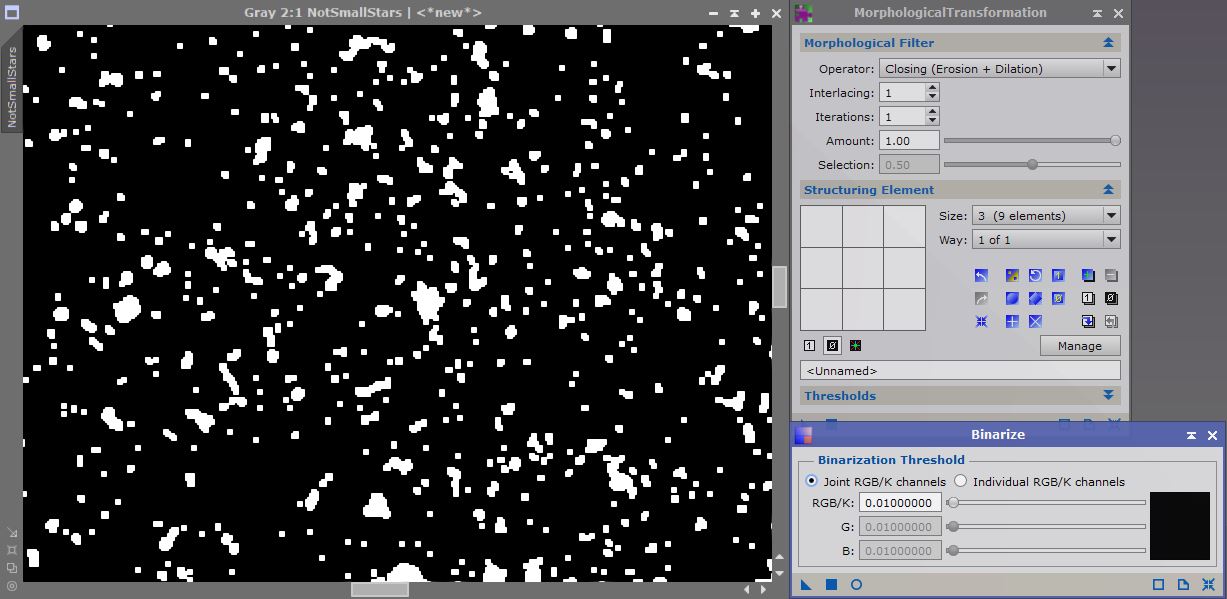
Step 1 : Create a copy of “StarMask” (I’ll call it “NotSmallStars”). We’re going to run MorphologicalTransformation in Closing mode again, but this time instead of using a large structuring element, we will use a 3×3 square. The image will contain every star except the small ones.
Step 2 : Binarize the image. I suggest using a 0.01 threshold.
Step 3 : This time, since we want to remove the small stars, we will simply multiply this image with the contours mask (and not the inverted image like we did with “BigStars). Apply the PixelMath expression “$T*NotSmallStars” to the contours mask.
Here’s a comparison showing the effects of those final adjustments
This concludes my tutorial on how to do star reduction. Feel free to contact me on Discord (ForaxX#0335) or Instagram (@thecoldestnights) if you have any questions/comments/suggestions regarding this article.




Thank you for this tutorial! I just found your website, the images are beautiful, and the tutorials are helpful and clear. I was curious if instead of using Starnet++ to create the starmask, if you could use a continuum filter like the Astrodon Red Continuum which produces a star field without nebulosity, and you’d end up with an image very similar to the rescaled starmask?
Once again, thank you!
Thank you! Those filters seem very interesting, especially in the cases where Starnet++ doesn’t perform well. The only difference I can think of is that the image produced by the filter will contain the background skyglow.
That being said, I don’t think this is necessarily a problem if you’re using the starless replacement technique described in the tutorial – and note that you’ll still need Starnet for that.. Using Pixelmath and the continuum filter image to create a starless image is probably doable but it sounds difficult.
You could also use MorphologicalTransformation in “Selection” mode to reduce the stars instead of the method described in the tutorial (to avoid creating a starless image), but for that you’ll need to subtract the background skyglow from the mask to avoid “eroding” the background.
This is just great! Congratulations!
I have a question: What if we have:
a. The main pic without color calibration of the nebula & background
b. A starless version with proper color calibration of the nebula and background
c. All of the above (star masks, contours etc)
If we run the final pixel math (starless) we are changing only the stars, so the nebula remains the same.
Which is the correct order and functions with Pixelmath for that? As far as I can understand we need to:
1.Extract stars
2.Color Calibrate
3.Put back the stars again (Is it just a simple “nebula+stars” expression? )
and then start the steps above?
I’m not sure I understand what you’re trying to do here.. It sounds similar to combining RGB stars with narrowband data, so here’s what I would do:
1. Extract the a/b channels from the RGB image (or alternatively, the color calibrated image… Shouldn’t be starless though)
2. Build a star mask and apply it to the NB image.
3. Use channelextraction in CIE L*a*b* mode, with a and b channels checked and set to extracted channels from the RGB image.
4. Apply the channelcombination tool through the star mask to the NB image.
My point is to edit the nebula alone, so I could make it pop up, without bloating the stars and then proceed with the star reduction method. So as far as I can understand, firstly I have to remove the stars with Starnet (new starmask), edit my Starless version, then put back the stars and after all of the above, I will be ready to follow your method.
Got it! Create the “stars_original” image using the following pixelmath expression : “original – starless_original”, then process the “starless_original” (now called “starless”) and add the stars back using “starless+stars_original”. I use this exact method in my deconvolution tutorial if you need more explanations 🙂
Thanks great tutorial. I found your page whilst searching for Star Mask vs Red Continuum filter. From your comment above it appears that the filter is not easy to implement into PI workflow. I am wondering how it is different to a PI generated Star Mask and is it worth the money as it is not cheap. Thanks again. Shaun
Thank you! As I said in the other comment, the image produced by the red continuum filter will also contain the background skyglow, whereas a PI generated Star Mask only contains the stars. Judging from what I have found on Google, it is certainly doable to use PixelMath and other processes to create a starless image and a star mask out of the red continuum image. That being said, I personally don’t own a red continuum filter so I am not sure what the exact steps would be, but I can guess that creating the starless image is not that easy. If you have money and if you trust your processing skills, I would say that the filter is worth it as the results will probably be better than what Starnet++ can achieve.
Thanks